Education
Tutorial: How Did the Giraffe Come Into the Picture?
By Severin - 9 min read

Giuseppe aka krapoz is a true master when it comes to image editing. In this 10 step tutorial, he shares his secrets on how anyone with an iPhone can transform an ordinary picture into a breathtaking, surrealistic masterpiece.
Giuseppe aka krapoz is a true master when it comes to image editing. In this 10 step tutorial, he shares his secrets on how anyone with an iPhone can transform an ordinary picture into a breathtaking, surrealistic masterpiece.
Have you ever got the feeling that you were being watched?
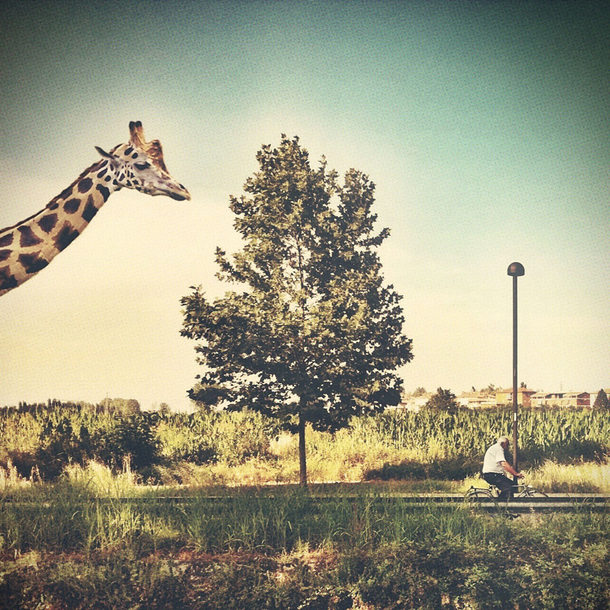
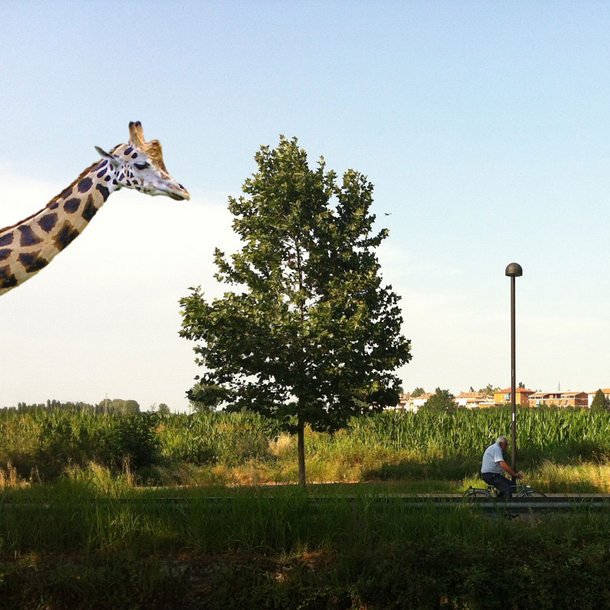
I usually like representing little visual stories within my images: this time I wanted to create something ironic and paradoxical involving a giraffe and an unaware character taken from the street. It was a sunny saturday afternoon in June so I only had to leave home and pull the phone out of my pocket chasing for the right situation.
I started from a picture taken with my iPhone 4 and originally did all the edits on an iPad 2; on this tutorial we are going to recreate the workflow on the iPhone instead, using the same apps employed during the processing on the iPad. We will adopt an “app-stacking” approach, since we will go through an iterative path of open-edit-save steps, app after app until we get the final result:
1. ProCamera
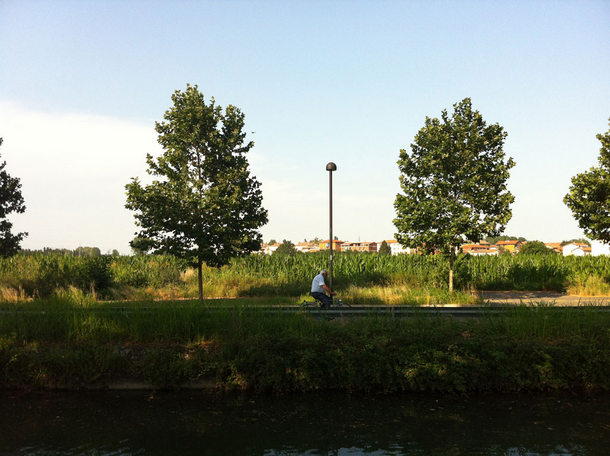
Apart from the standard camera system app, this is one of my favorite apps for shooting. Like many other mobile photographers out there, I really enjoy its implementation of separate focus/exposure/white-balance control; so, having put the app in Expert Mode with the composition grid on, I set up everything and shot when the biker was passing across the scene.
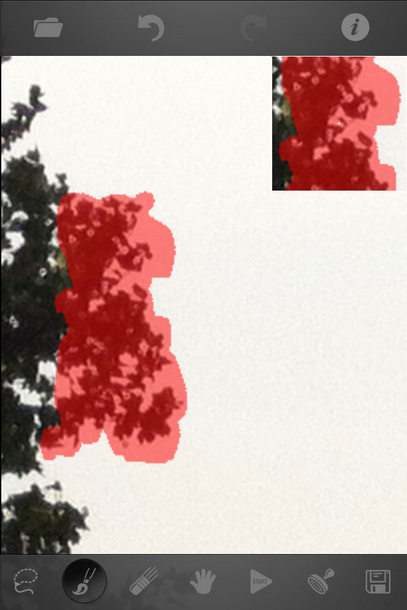
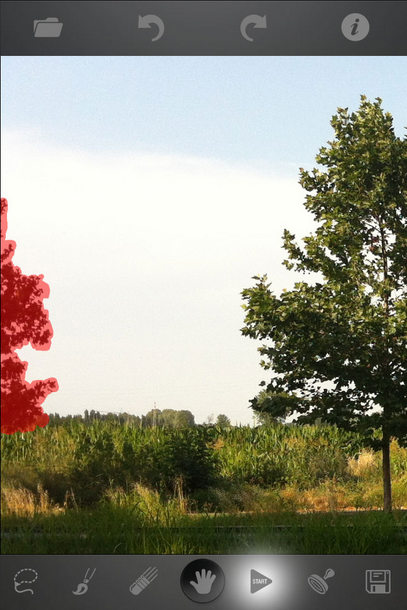
2. TouchRetouch
This is definitely the perfect app to get rid of unwanted elements in a picture. In this case I wanted to remove the tree on the left. So, load the photo and, with the hand tool selected, zoom and pan on the tree; then, by means of the brush properly sized, cover the tree. Then push START: voilà – like magic, the tree disappeared! Save the resulting image.
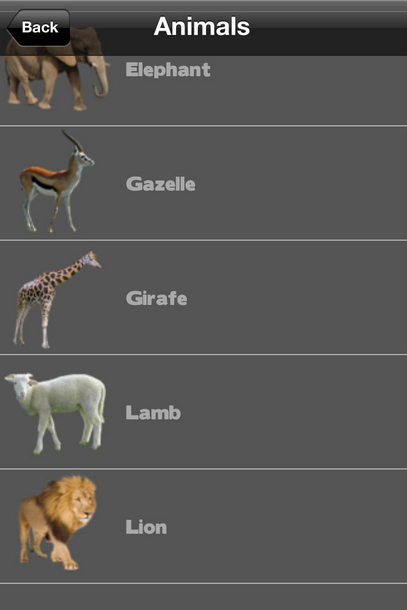
3. VFX Studio
I find this app extremely useful in creating nice compositions thanks to its well-equipped library of, as they call them, FXs. I particularly like the collection of animals, right where I picked up this cute giraffe.
So, load the image saved in the previous step, open the “FX” library inside the group on the left, then select the giraffe item within the “Animals” list. Once on the canvas, set the desired scale, position and rotation of the element making use of the standard gestures. As always, don’t forget to save.
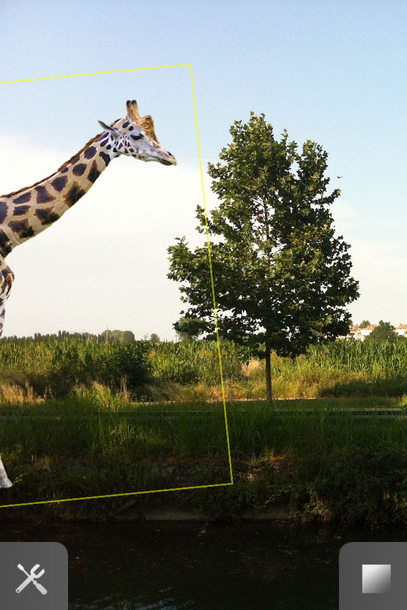
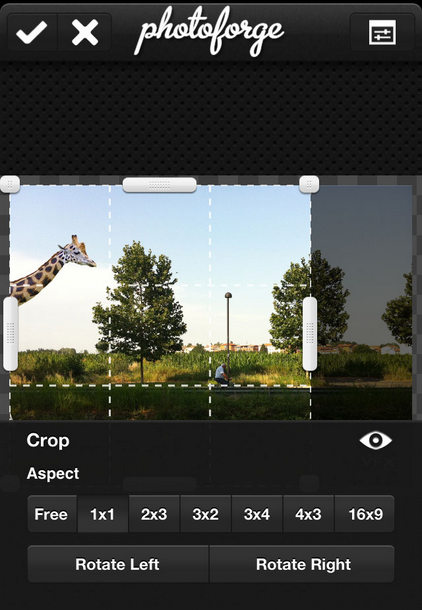
4. PhotoForge2
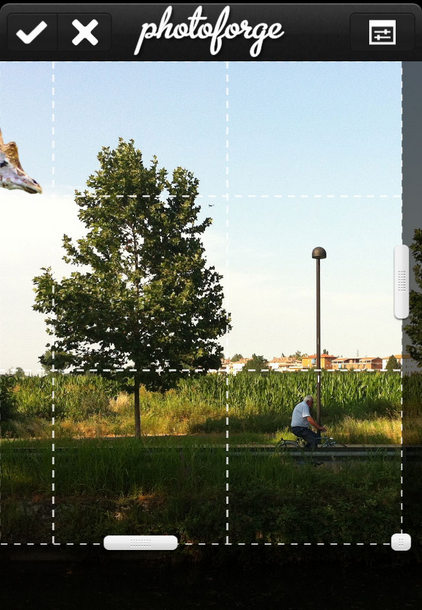
A mini-Photoshop in your pocket, this app includes my favorite tool for cropping: in addition to the usual aspect-ratio presets and the drag-to-select tool, by means of zoom (double-tap) and pan gestures you can easily get a pixel-perfect crop of the image; not to mention the presence of a grid, essential for the right composition of the elements inside the crop area.
Load the previously saved image, using the corresponding “Straighten” and “Crop” tools inside the group marked by pencil and ruler. First do a quick straightening of the image; hence do a 1×1 square crop to center the tree and arrange the elements according to an approximate rule of thirds. Then save the image.
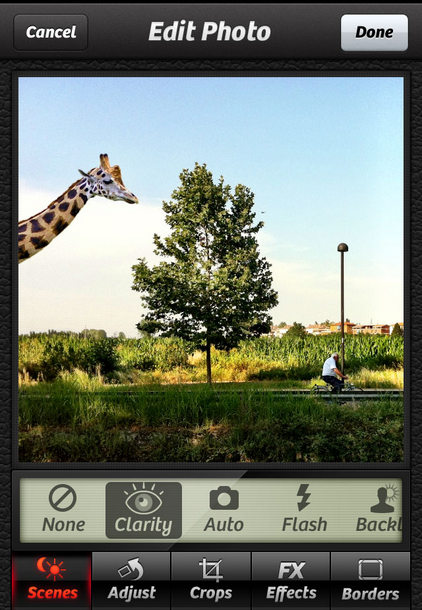
5. Camera+
Anyone unfamiliar with this app? I just wanted to pull out the details of the image: nothing can beat the excellent “Clarity” preset, inside the “Scenes” group. As before, load the image resulting from the previous step, apply the Clarity scene then save.
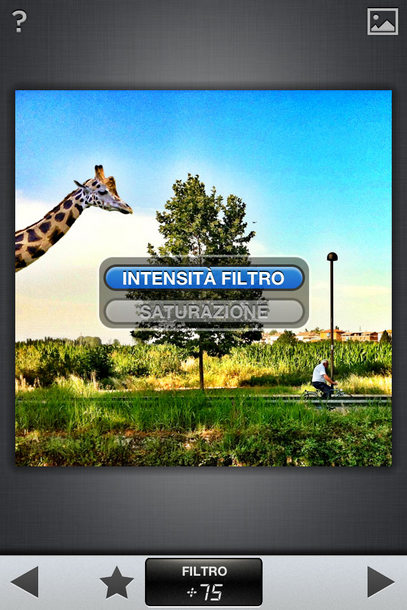
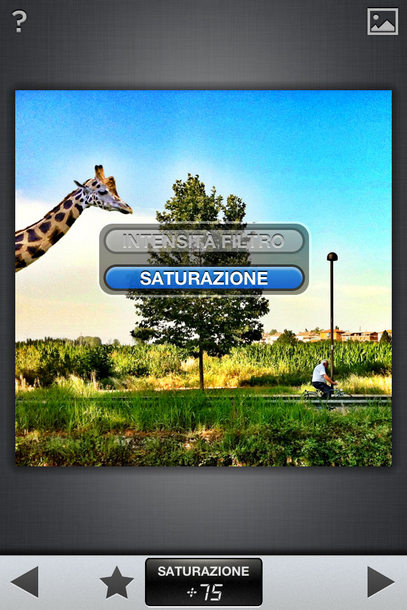
6. Snapseed
This is definitely one of my favorite apps, I really love its interface and the extreme editing power you can get with the large set of tools included.For our purposes we are going to use the “Drama” filter (intensity +75, saturation +75), thus enhancing contrasts and saturation as if we were to get a subtle HDR effect.
This passage could seem a little odd but we are only preparing the field for the next step when a significative fading will occur. Did I tell you to save the image?
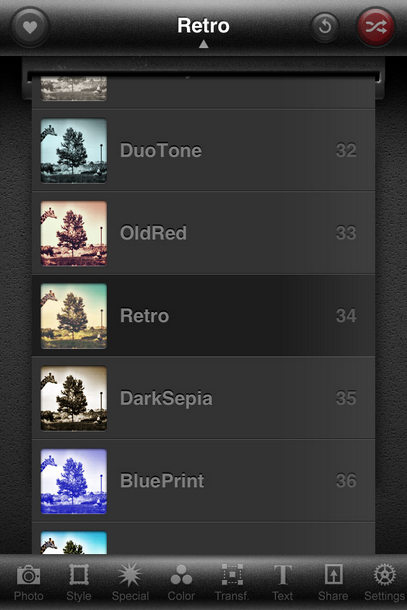
7. PictureShow
One of the first photo editing apps I fell in love with, this is still one of my favorites for quick color corrections.Load the image from the previous step then tap on the top-center button to unveil the dropdown menu: select the “Retro” filter. In my opinion this is one of the most convincing retro-looking effect available and works great when used on over-contrasted/saturated images.
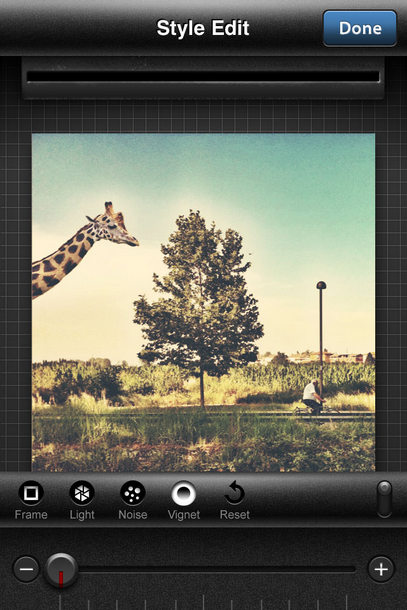
This done, open the “Style” group and select the “Vignet” control. Remove then the default vignette by moving the cursor to zero. Save the image and get ready for the next step.
8. Photo FX
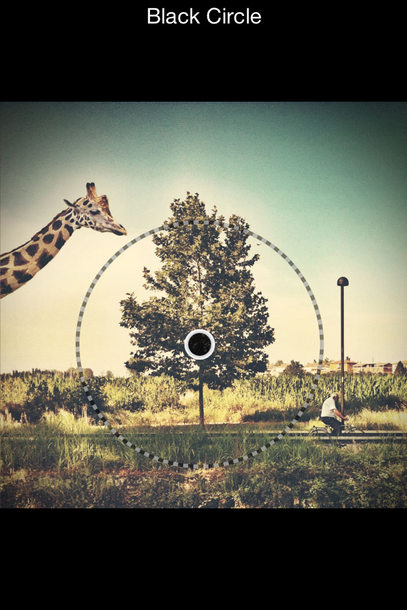
My go-to app for fine tuning, in this case I used it for two purposes: vignetting and grain.Under the “Lens fx” group, select “Vignette” then “Black Circle”. Set Softness to 200 and Amount to 75; this done, tap on the fourth button from the left (a circle with a dotted line around) to start controlling radius and position of the vignette: move the circle slightly downward in order to have more vignetting on top of the image. Be careful not to cover the head of the giraffe and the tree.
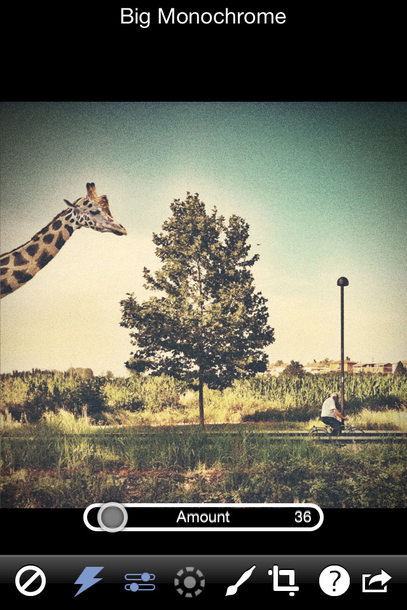
Regarding the grain, this is a trick I use every time I mix different elements in the same image (the giraffe and the original capture): applying the right grain not only can increase the effect of having a single scene with no artifacts but also can give the image a nice film-like appearance. Go to “Film Lab” and select “Grain”. Pick the “Big Monochrome” grain and set Amount to 36. Save the image and you’re done.
9. Halftone
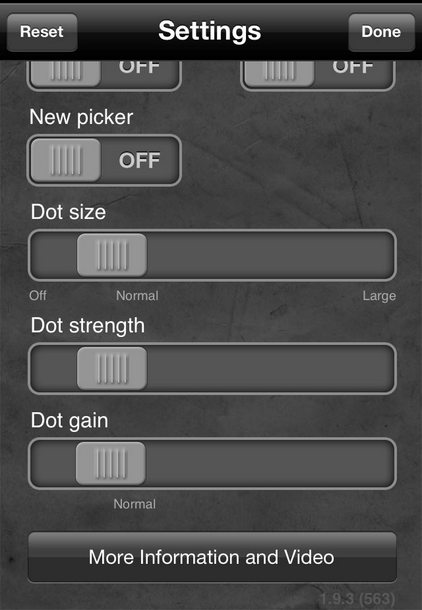
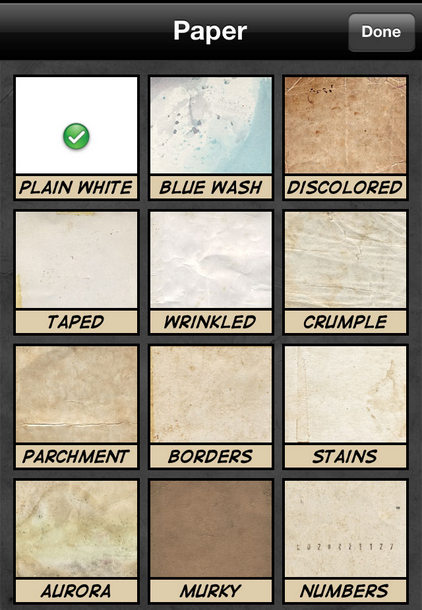
To enhance the overall ironic sense, as a final touch I decided to add a slight comics effect to the image. Which app better than Halftone for this?As always load the last image; open “Settings” and set Dot size, strength and gain approximately to “Normal”; then check that paper is “Plain White” and no layout is active.
This way you obtain a subtle yet striking halftone effect. I’m happy with it, but since I’m obsessed with details, I would be happier with the effect applied everywhere except on the “actors” of the image (the giraffe, the tree and the biker). Save the resulting image and prepare for the last step.
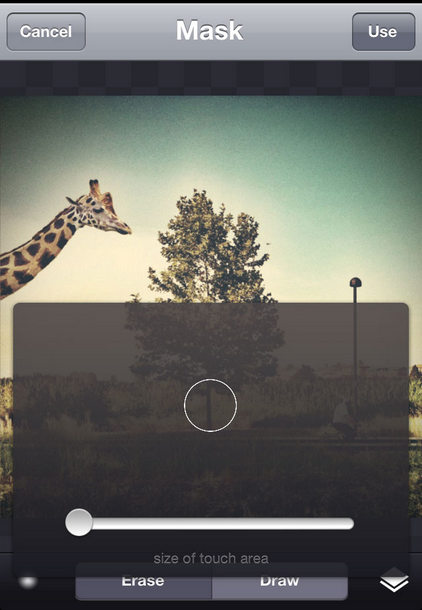
10. Image Blender
I have a love affair with this app: better and better, release after release, it’s always been of great help every time I needed to blend different images. In this case I quickly erased the halftone effect from unwanted areas by means of its masking feature, after having stacked the images from the last two steps.
So, load the image from step 9 (halftone) as background (tap on the bottom-left square) and the one from step 8 (no-halftone) as foreground (tap on the bottom-right square); then move the slidebar to the right, assigning 100% visibility to the image without halftone. This done, tap on the image area to activate Edit mode and select “Mask”.
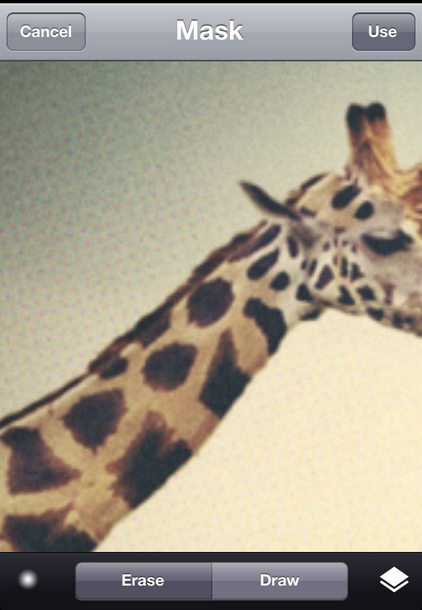
As said, we want to erase the halftone effect from specific areas of the image, namely the giraffe, the central tree and the biker: set a small, soft brush (tap on the bottom-left circle) in “Erase” mode and patiently erase the halftone effect by painting on the image. To make this work easier don’t forget to zoom and pan with the usual gestures, thus positioning the image onto the desired areas. Once satisfied, tap on “Use” and save the resulting blending.
You’re now ready to share your brand-new work of art on EyeEm!