Education
10 Tips & Tricks to Photograph Water with Your Phone
By Maddie - 4 min read

Ever have trouble taking photos when water is involved? We’re here to help you out.
Over 2/3 of the world is covered in water, and our bodies are more than 50% water. Water is in us and all around us, so it’s no wonder that it is the subject of countless photographs. We have put together a list of expert tips and tricks to level up your photographs of water. For further inspiration, check out these beautiful albums: water Water reflections and waterfall
So let’s get started!
1. Time your photo based on light
As with all types of photography, light is incredibly important. If you want to capture the reflective nature of water, then the right light is absolutely essential. The best times to shoot water are either in the morning (at sunrise) or in the evening (at sunset) when the glare of the sun is not too strong.

2. Use different shutter speeds
While this can normally only be adjusted on cameras (i.e. devices whose sole function is to photograph), there are several apps that allow you to speed up or slow down the shutter speed.
To create beautiful silky photos of water you need to slow down your shutter speed. This will make the water look like one constant stream, almost mist-like. You can try out Slow Shutter Cam for the iPhone or Speed Shutter for Android.

However, if you want to capture waves crashing on the beach with razor sharp precision, then you need to increase your shutter speed and decrease your exposure time. With a fast shutter speed, you can be sure to catch even the tiniest droplets of water being launched into the air.

3. Find the right location
If you want to photograph reflections, then lakes and ponds are best since they are usually sheltered from the wind. The slightest amount of wind can disturb the water, which can ruin your shot.

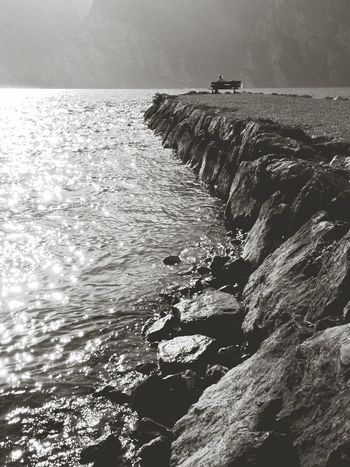
4. Include visually interesting elements
When choosing what to include in your shot, be sure to include elements that are visually interesting – such as rocks jutting out into the ocean or houses lining the lake.
5. Plan your shot
This goes even further than finding the right location; you also need to find the right angles and spots to take your picture at the location. It is best to arrive at least 30 minutes before you want to start shooting to ensure that you have found the perfect site.

6. Make sure your lines are straight
When shooting water, it is very likely that the horizon will be in your picture. As a result, you need to ensure that your image is straight and that you frame the image in line with the horizon.

7. Do not use flash
With flash you can create a “hot spot” on the water, which reflects in your pictures and can ruin your shot.
8. Get in close when someone or something is jumping into water
Capture every detail of the splash by getting in close. Just make sure your phone is protected!

9. Get a waterproof case and go deep down
Take photos from a unique perspective – underwater. In the past this could only be down with high tech camera equipment, but now you can capture some great images with an inexpensive waterproof case for your phone.

10. Take pictures from the water
By this we mean find some way to get on the water, either in a boat, on a pier or some other way, and capture the incredible views from this unique perspective. There are so many photos taken from the beach looking out over the water, but what about the other way around?
Feeling inspired? Then get out and photograph water and add your photos here: water Water reflections and waterfall.