Tutorials
10 Tips & Tricks on Shooting Photos in Low Light
By EyeEm - 6 min read

Shooting great photos in low light conditions is one of the hardest things to do with a mobile device. We want to make it a little bit easier for you.
Shooting great photos in low light conditions is one of the hardest things to do with a mobile device. We’ve put together 10 tips & tricks to make it a little bit easier and show you how you can create beautiful images with as little light as possible.
For inspiration you should have a look at the albums Nightcall, Nights Lights, Nightphotography, Night View or Light and Shadow.
Now let’s jump right into it:
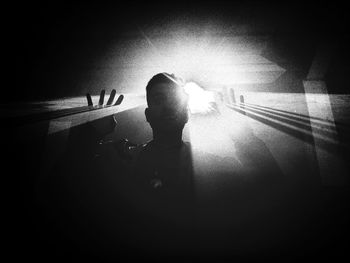
1. Locate your light sources
Where there is no light, there is no photograph. Fact. So whenever you are in low light situations you need to search for the light and use it to your advantage.
Look for lamps, lanterns, spotlights or even moving light sources like car lights. Don’t shoot against them but rather use their glow to light a bigger part of the scene you’re taking photos of.

2. Don’t trust your phone
Most phone cameras work with automatic settings, i.e. they automatically measure the light around you and adjust the exposure to that. Very often though they have troubles with low light situations and make the photo even darker than the actual setting.
But there’s a trick to outsmart your phone: first point your camera to a bright subject (like a spotlight or the sky during sunset) and then shoot the darker setting. The camera is usually not fast enough to adapt to the darker setting and will give you a brighter, but possibly noisier exposure.
3. Color is your friend
After you found some light, find some color. Colored light, such as illuminated advertising or traffic lights, can add some great atmosphere to your shots. Use filters like Boost to even pitch the colors a little higher and you’ll get beautifully atmospheric and moody results.

4. Shoot landscapes
The wider your angle, the more light pours into your lens. So if you’ve got that last bit of natural light around you and a close up shot just gives you darkness, go for shooting the whole landscape. You’ll see that you’ll get more out of it than in a more narrow focus.

5. Use backlight to add strong contrast
Back light is light that’s placed behind your subject and usually shines against you. It usually takes details away and results in your subjects becoming silhouettes. But it also adds great contrast to your shots. Be aware of that and you’ll be able to play with it.

6. Use your flash wisely
We know it’s tempting, but your phone’s built-in flash usually does more worse than good. It’s hard to control and burns out all the colors. Rather trust in yourself, search for a constant light source and take on the challenge to produce a stunning shot without the use of artificial lights.
Pro tip: use a flash when there are cats from outer space around. The effect can be tremendous!

7. Stabilize your camera
Long exposures are great, but often result in blurred photos. That’s because you can’t really hold your hands still without shaking. So instead, place your phone on something steady like a wall, pole, a parked car or on the ground.
Hold your breath while you shoot and you’ll suck all that beautiful natural light right into your photo without shaking.
8. Embrace the noise
Most likely a longer exposure will lead to more noise in your shots – embrace it and feature it in your shot. Noise always makes your foto appear more rough, edgy and raw. Just like an early Nirvana bootleg.

9. Search for reflections
Believe us, there’s nothing more beautiful to shoot than a wet street after it rained with the surrounding lights beautifully reflecting on the surface. And the smell is great, too. When there’s not much light rain, snow, puddles or shiny surfaces are your best friends.

10. Take advantage of editing tools
If you can’t see much on a photo you took in low light settings, try boosting its highlights, contrast and saturation. Learn the characteristics of filters such as kCe, Vanilla or Gee and you’ll be able to get more of low light situations by boosting the tones afterwards.

Apps to help you in low light situations:
– ProCamera to get full control of your camera settings
– SnapSeed for post editing
– Long Exposure to get those long exposures right
Thanks to our EyeEm Ambassadors Victoria, Axrii, Fernando, Stefan, Javier, Jose, Joshua, Josh, Martin, Annabel, Michael, Jaime, Frank and Lori for your input!
What other great techniques do you use when shooting at night?
Recommended Blog Posts
– 9 Tips & Tricks on How to Boost your EyeEm Account
– Learning from Cinema: 10 Tips & Tricks on Framing Your Photos
– How To Use The Rule of Thirds To Get Charming Compositions